Watch
Bathtub Replacement in Florida: Finding Hidden Water Damage
Why Water Damage Hides Under a Tub
A bathtub hides its own damage because the failure points are sealed away from view. The drain shoe, the overflow gasket, and the joint where the tub flange meets the wall all leak slowly, and that water runs down inside the wall cavity or under the tub deck where no one looks for years. In a Florida climate, ambient humidity keeps the hidden cavity damp long after a single drip would have dried in a drier state.
The slow leak versus the obvious one
Most homeowners expect a burst pipe. The damage that actually rots a Florida tub assembly is the opposite: a few drops per use from a hardened overflow gasket or a failed drain-shoe washer. Over several seasons that small, repeated wetting saturates the subfloor at the drain or the framing behind the surround. Because the rate is so low, there is no flood and no insurance claim — just quiet decay.
Why the Florida climate makes it worse
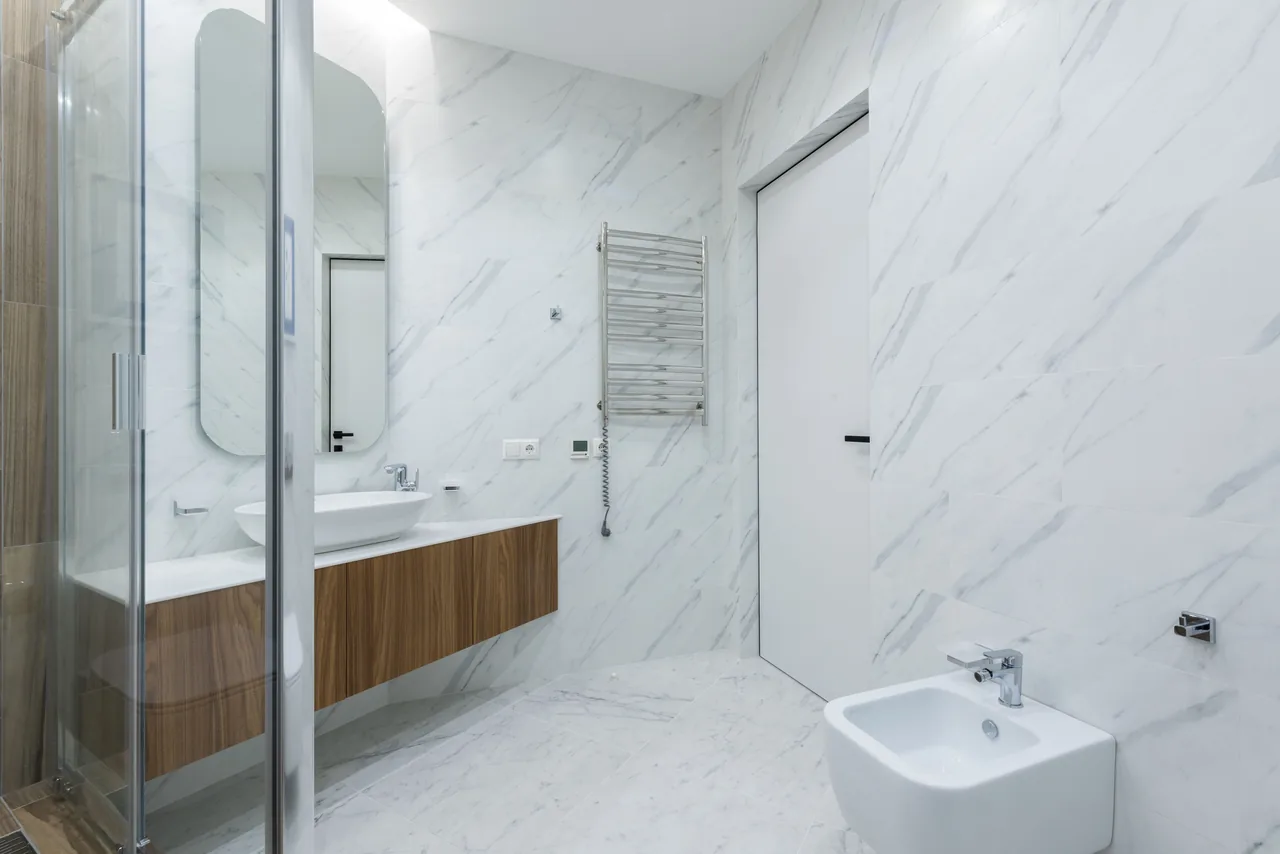
Indoor relative humidity in an air-conditioned Florida home still runs high, and a bathroom adds shower vapor on top of that. Damp organic material — plywood, oriented strand board, paper-faced drywall, and framing lumber — never gets the chance to dry between wettings. That sustained moisture is the precondition for both wood rot and mold growth, which is why a tub that looks fine on the surface can sit on a substrate that has been failing for years.
What to Check Before You Start
Before the first fastener comes out, document the existing assembly and look for the signs that predict hidden damage. A ten-minute inspection up front tells you whether you are doing a clean swap or opening a repair, and it sets expectations for scope, drying time, and whether a permit is in play.
The early-warning signs
- A flexing or spongy tub floor — the deck moves underfoot, signalling a rotted subfloor or corroded support under the drain.
- Stained or peeling surround joints — discoloration where the tub meets tile or a fiberglass surround points to water tracking behind it.
- A musty smell that never clears — a persistent earthy odor is the classic signature of mold in a hidden cavity.
- Soft or stained baseboard nearby — water that reached the adjacent floor has usually already passed through the subfloor at the tub.
- Efflorescence on a slab — a white mineral bloom on concrete near the tub is a sign of long-term moisture migrating up through the slab.
Any one of these signs raises the odds that removal exposes real damage, so plan the job as a repair-first project rather than a same-day cosmetic swap.
Confirm what is under your floor
Whether you have a wood-framed floor or slab-on-grade construction changes everything about where damage hides and how you dry it. Most single-story Florida homes are built on a slab; raised and older homes have a wood subfloor over a crawl space. Identify which you have before you start, because the inspection, the rot risk, and the repair are different for each.
Inspecting as the Tub Comes Out
The moment of removal is the single best inspection opportunity you will ever get, so treat it as a controlled investigation rather than a demolition. Once the surround and tub are out, the drain, the subfloor, and the lower wall framing are all exposed at once — the exact spots where Florida moisture does its damage.
- Step1
Shut off and disconnect
Close the supply stops, disconnect the drain and overflow, and remove the spout and valve trim. Capturing the existing rough-in dimensions now tells you whether the new tub lands on the same drain.
- Step2
Open the surround
Remove the tile or fiberglass surround and the backer behind it. This is where mold most often hides; expect dark staining on the framing if the wall has been wet.
- Step3
Free and lift the tub
Cut the caulk and fasteners at the flange and lift the tub clear. On a wood floor the subfloor at the drain is now visible; on a slab the trap and drain penetration are exposed.
- Step4
Probe and meter
Press a screwdriver into the subfloor at the drain and along the wall plate. Soft wood is rot. Then take moisture-meter readings before deciding the substrate is sound.
Photograph the rough-in before you cut anything
Capture the drain location, trap arm, and supply height against a tape measure. If the new tub uses a different drain position you have just confirmed the project crosses into permit territory, and the photos become your record for the inspector.
Working methodically through removal turns a demolition into a diagnosis, and the readings you take here decide every step that follows.
The Rotted Subfloor at the Drain
A rotted subfloor at the drain is the most common hidden finding in a Florida tub replacement on a framed floor. The plywood or oriented strand board directly under the tub shoe absorbs the slow drip, loses its structure, and turns dark, soft, and delaminated. It cannot be sealed over or painted; the affected sheet and any decayed joist must be cut out and replaced.
How to confirm rot, not just stains
Staining alone is not rot. The test is mechanical and moisture-based together. Probe the wood: sound subfloor resists a screwdriver tip, while rotted material crushes or flakes. Then read the moisture content. The NWFA installation guidelines require a subfloor that is dry and structurally sound before a finished floor goes over it, and treat a subfloor that exceeds roughly 12% moisture content as not ready.
- Sound subfloor
- Firm under a probe, no delamination, and a moisture-meter reading in the normal range — generally 6% to 12% MC for interior wood in service. It can be cleaned, dried, and reused.
- Rotted subfloor
- Soft, dark, crumbling, or visibly delaminated plywood. There is no repair short of cutting it out back to sound framing and installing new material.
When the damage reaches the joist
If the rot has tracked from the subfloor into the joist below, the structural member itself is compromised and a sister joist or full replacement is required. That is a structural repair, not a cosmetic one. Our crews handle this as dedicated subfloor and joist repair before any new tub is staged, because a tub set over a soft joist will telegraph the flex straight into the new unit.
Mold Behind the Surround
Mold behind a tub surround is the second signature Florida finding, and it is a health and remediation question, not just a cosmetic one. Years of shower vapor and a leaking flange feed colonies on the back of the backer board and the wall framing, where they grow unseen until the surround comes off. What you do next depends on how much surface area is affected.
The EPA size threshold that decides your approach
The EPA uses a clear line for homeowner-scale cleanup. Mold covering less than 10 sq ft of contiguous area can generally be cleaned by an informed occupant with proper protection. Growth larger than 10 sq ft calls for a professional, containment with 6-mil polyethylene sheeting, and the practices in the EPA's commercial-building guidance and standards such as those from the IICRC.
Decide by the affected area
- If the growth is under 10 sq ft on hard, non-porous framing — clean with detergent, dry fully, and confirm with a moisture meter before closing the wall.
- If the growth is over 10 sq ft, or on porous material — bring in a remediation professional, build containment, and replace the affected backer and any saturated framing.
- If the wood under the mold is soft — treat it as rot, not surface mold; the member is removed regardless of the area.
Replace the substrate, do not just scrub it
Paper-faced drywall and standard backer that have grown mold are porous and should be removed rather than cleaned, because spores embed in the material. This is the moment to rebuild the wet wall correctly with a moisture-appropriate backer and a continuous waterproofing layer; our guide to waterproofing Florida wet rooms covers the assembly that keeps the cavity dry for the life of the next tub.
Handled at the substrate level, the mold problem is solved permanently; scrubbed at the surface, it simply returns with the next humid season.
When the Tub Sits on a Concrete Slab
On a slab-on-grade home the hidden-damage story changes, because there is no wood subfloor at the drain to rot. The risk moves to the slab itself and the trap cast into or routed under it. A tub drain that has leaked below the concrete leaves staining, mineral deposits, and sometimes a soft, eroded pocket around the penetration.
What to look for on the slab
- Efflorescence around the drain — a white, powdery mineral bloom signals water that has been moving up through the concrete.
- Persistent dark staining — a damp shadow on the slab that does not lighten as it dries indicates ongoing moisture, not an old spill.
- A loose or corroded trap — movement at the drain penetration means the seal to the slab has failed and water has been entering below.
- Soft or spalling concrete — eroded material right at the drain points to a long-running leak under the tub.
None of these conditions rot in the way wood does, but each one must be cleaned, dried, and sealed before the new tub is set, or the same leak path simply continues under the replacement.
The drain is the decision point
If the slab is sound and the new tub uses the existing drain location, the slab work is limited to cleaning and sealing. If the drain has to move even a few inches to fit the new unit, the project requires saw-cutting and trenching the concrete to reach the DWV line — the same work covered in our look at relocating bathroom plumbing on a Florida slab, and a clear trigger for both a permit and a licensed plumber.
When You Need a Permit in Florida
Under the FBC, the deciding question is whether you are altering the plumbing or only the fixture. A straight like-for-like tub swap in the same location, with no change to the drain, water supply, or vent, is generally treated as a minor repair that does not require a permit. The moment any of that piping is relocated, added to, or rearranged, a permit is required.
Permit-exempt versus permit-required
| Scope of work | Permit in Florida | Why |
|---|---|---|
| Same tub footprint, same drain and supply | Generally exempt | Counted as fixture replacement / minor repair under the FBC |
| Replace a defective drain, trap, or vent pipe | Permit | Removal and replacement of waste or vent piping is not a minor repair |
| Move the tub or relocate the drain | Permit | Rearrangement of drain, supply, or vent triggers review |
| Tub-to-shower conversion | Permit | New wet footprint, re-sloped drain, and re-waterproofing |
Always confirm with your local building department, because Florida jurisdictions administer these exemptions individually and the thresholds can be read more strictly than the statewide language suggests.
The licensed-plumber question
Once the work crosses into the drain, supply, or vent, Florida law (Chapter 489, Florida Statutes) puts it in the scope of a licensed plumbing contractor unless the building contractor holds that trade. A cosmetic swap you can often do yourself; a relocated drain you cannot, regardless of skill, without the proper license and inspection.
The safe rule is to treat any pipe you touch beyond reconnecting the existing trap as permit-and-license work, and to keep the photographs you took at removal as your record.
Drying the Substrate and Setting the New Tub
The new tub does not go in until the substrate is dry and sound, because every hidden failure you just repaired will repeat if you set the tub over wet material. This is the discipline that separates a tub that lasts twenty years from one that fails in three, and in Florida it is the step most often rushed.
Verify dry before you set
Confirm with a meter, not a calendar. A wood subfloor and framing should read in the normal interior service range — generally under about 12% moisture content per NWFA practice — and a slab should be clean, sealed, and free of active staining. If readings are high, run air movement and dehumidification until they drop; closing the assembly over damp material is the single most common cause of a repeat failure.
Build the wet wall back correctly
Reinstall a moisture-appropriate backer and a continuous waterproofing layer before the surround goes on, so the next decade of shower vapor never reaches the framing again. This is also the time to choose the new unit deliberately — our comparison of freestanding versus alcove tubs and the floor support each demands matters most when the framing is open and you can reinforce it.
Set, connect, and seal
With the substrate proven dry, set the new tub level, connect a new drain and overflow assembly with fresh gaskets, and seal the flange-to-wall joint. A professional bathtub replacement or new bathtub installation includes that final water test before the surround closes, so a leak is caught while the cavity is still open. Done in this order, the replacement fixes the hidden damage permanently instead of sealing it back into the wall.
Frequently Asked Questions
What should I check when replacing a bathtub in Florida?
What are the signs of a rotted subfloor under a bathtub?
How do I deal with mold behind a tub surround?
Do you need a permit to replace a bathtub in Florida?
How do you replace a bathtub on a concrete slab?
How long should the subfloor dry before installing a new tub?
References & Sources
- Hillsborough County, FL — Work Exempt from Permits (fixture replacement vs. drain/vent work). https://hcfl.gov/businesses/permits-and-records/permits/work-exempt-from-permits
- Florida Statutes Chapter 489.105 — Contracting (plumbing contractor scope, DWV work). https://www.flsenate.gov/Laws/Statutes/2025/489.105
- U.S. EPA — Mold Remediation in Schools and Commercial Buildings (10 sq ft threshold). https://www.epa.gov/mold/mold-remediation-schools-and-commercial-buildings-guide-chapter-3
- U.S. EPA — A Brief Guide to Mold, Moisture and Your Home. https://www.epa.gov/mold/brief-guide-mold-moisture-and-your-home
- National Wood Flooring Association (NWFA) — Technical / Installation Guidelines (subfloor moisture and soundness). https://nwfa.org/technical-guidelines/