Watch
Wet Room Tanking in Florida: Whole-Bath Waterproofing
What a Wet Room Is
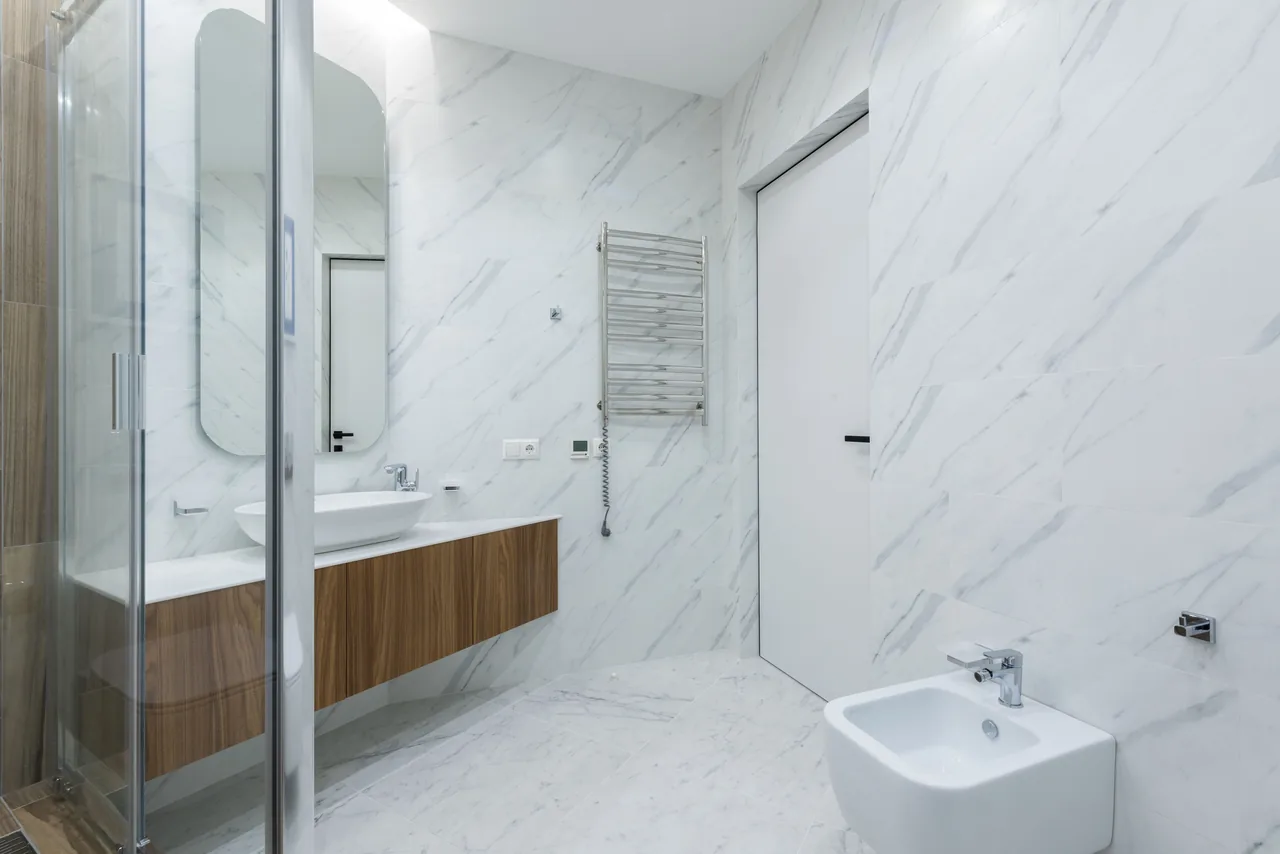
A wet room is a bathroom where the entire floor is the shower floor. There is no curb, no raised pan, and no enclosure separating a wet zone from a dry one — the room drains as a single tiled surface, usually behind a frameless glass screen that only redirects spray. Because nothing dams the water at a threshold, the whole floor and the lower walls have to be waterproofed, and that whole-room waterproofing is what the trade calls tanking.
A tanked room, not a contained box
This is the part homeowners and even some installers get wrong. A standard tiled shower waterproofs a contained box: a sloped pan, a curb, and walls up to the showerhead. A wet room removes the box. Water sheets across the open floor, runs under the vanity, reaches the base of every wall, and finds the door. If the membrane stops where a shower stall would have stopped, the water does not — and in a curbless Florida bath it goes straight to the slab and the framing under the rest of the room.
Why the layout is worth the discipline
The appeal is real: a level, barrier-free floor is easier to clean, reads as larger, and is the most future-proof layout for aging in place because there is nothing to step over. None of that survives a waterproofing shortcut. The design only works if the tanking is continuous, which is why a wet room is a waterproofing project first and a tiling project second.
Tank the Whole Floor, Not the Stall
Tanking covers the complete bathroom floor and carries up the walls as a single uninterrupted membrane, so there is no edge for water to find. The bonded membrane runs from the drain, across the open floor, up every wall in the wet zone, and laps into itself at every corner and penetration. One missed seam fails the whole room rather than one stall.
Where the wet zone actually ends
In a curbless layout there is no clean line where "shower" becomes "bathroom," so the waterproofing cannot stop at an imaginary one. Standards-based curbless methods carry the continuous bonded membrane across the receptor and extend it well past the showering area — at least 12 inches beyond the shower under the TCNA curbless receptor methods, and in a true wet room the practical answer is the entire floor. The walls are tanked to a height that comfortably clears the spray, and around a tub or bench the membrane wraps every face.
Why a single seam matters more here
In a stall, a flaw in the membrane leaks into a contained, sloped pan that still drains. In a wet room, the same flaw sits under an open floor that drains slowly across its whole area, so water lingers on the membrane and probes every weakness. A pinhole at a pipe penetration, an unsealed inside corner, or a lap that was never rolled tight becomes the one place the whole room drains into. The continuity of the tank is not a finishing nicety; it is the entire waterproofing strategy.
The penetrations that fail first
A continuous tank still has to wrap the spots where the geometry turns complicated, and those are where leaks start. Each is sealed with the membrane manufacturer's matching corners, pipe seals, and reinforcing band — not caulk — so the barrier stays unbroken. These transitions are detailed before any tile is set:
- Drain connection — the membrane laps into the drain's clamping ring or bonding flange so water reaches the drain without slipping behind it.
- Supply and waste pipes — each penetration gets a preformed pipe seal bonded into the membrane, never a bead of sealant alone.
- Inside and outside corners — factory corners or reinforcing band carry the membrane around every change of plane without a thin, stretched spot.
- Niche, bench, and screen anchors — every recess and fastener through the wet zone is membraned and back-sloped so it drains forward instead of trapping water.
A wet room lives or dies at these five transitions, so a crew that details them first and tiles second is the one whose tank actually holds.
A118.10 L vs S: The 2024 Split
The membrane that tanks a wet room is governed by one standard: ANSI A118.10, the specification for load-bearing, bonded, waterproof membranes for thin-set ceramic tile and dimension stone. "Load-bearing" matters because the membrane carries the tile assembly for the life of the floor — waterproof alone is not the bar.
What the 2024 revision changed
What changed recently is how you specify it. For years A118.10 did not distinguish liquid from sheet products. The 2024 edition of the installation standards (ANSI A108/A118/A136.1) lets a specifier call out the membrane type directly:
- A118.10 L — a liquid-applied membrane, trowel- or roller-applied, that cures into a continuous, seamless film bonded to the substrate and conforms to corners, the drain, and irregular wet-room geometry without lapping.
- A118.10 S — a sheet membrane, a factory-made sheet bonded to the substrate with thin-set, with seams and corners detailed using matching band and preformed pieces at a uniform manufactured thickness.
- The v designation — an optional water-vapor-permeance rating for products that test under 0.5 perms, added for steam showers and the low-perm assemblies a humid, slab-on-grade Florida bath benefits from.
The practical takeaway is that "an A118.10 membrane" is no longer a single thing to wave at. You are now choosing L or S deliberately, and on a wet room that choice changes how the tank is built and inspected.
Liquid vs Sheet, Chosen on Purpose
Both A118.10 L and A118.10 S can tank a wet room correctly; they fail in different ways when they are rushed. The honest decision is about thickness control and geometry, not about which brand a crew prefers.
| Attribute | A118.10 L (liquid) | A118.10 S (sheet) |
|---|---|---|
| How it waterproofs | Cures into a seamless bonded film | Factory sheet bonded into thin-set |
| Thickness control | Installer must build to spec; ~40 mil wet in two coats | Uniform by manufacture; consistent everywhere |
| How thickness is verified | Wet-film gauge during application | Visual full-coverage bond; no thin spots to gauge |
| Complex geometry | Excellent — conforms to corners and curves | Good, with preformed corners and pipe seals |
| Ready to flood-test | After full cure | Often sooner than a curing liquid |
| Most common failure | Applied too thin or in one coat | Loose lap or unbonded seam |
The wet-mil minimum is the whole point of liquid
A liquid membrane is only waterproof at the thickness the manufacturer requires. Most call for two coats applied at right angles to a wet-film thickness in the neighborhood of 40 mil wet, which cures down to roughly 24 mil dry to meet A118.10 — and the only way to know you hit it is a wet-film gauge pressed into each coat. A single thin coat looks finished and tests fine to the eye, then cures into a film that is below spec and lets vapor and water through. The gauge is not optional on a wet room; it is the inspection that makes a liquid tank real.
Why two coats, applied at right angles
The second coat is run perpendicular to the first for a reason: crossing the application direction bridges the pinholes and thin streaks the first pass inevitably leaves, so the cured film has no continuous weak line. On a wet-room floor that is the difference between a membrane that is uniformly at spec and one that is technically two coats but riddled with holiday gaps a gauge would have caught.
Why sheet appeals on a big open floor
A sheet membrane removes the thickness question because the waterproof layer is made in a factory to a known dimension. The risk moves to bonding and seams: a lap that was not fully embedded, or a corner that was not detailed with the matching preformed piece, becomes the leak. On a large wet-room floor, many installers favor sheet for the certainty of uniform thickness and accept the discipline of rolling every seam tight. The full-room version of this assembly is the heart of the whole bathroom remodels we tank across Florida.
The Curbless Floor and Its Drain
A wet room has no curb, so the floor itself has to move every drop of water to the drain without a lip to hold it back. The slope and the drain type are chosen together, because the drain dictates how many directions the floor has to pitch.
Pick the drain for a curbless floor
- If you want large-format tile and the simplest tank — a linear drain needs only a single-plane slope, so the floor pitches in one direction and the membrane runs in a straight, easy-to-detail plane.
- If the drain stays centered and the tile is small or mosaic — a point drain pitches the floor in four planes to a center, which suits mosaics whose many grout joints absorb the compound slope.
- If the entry must drain too — place a linear drain at the threshold or along a wall so water sheeting toward the door is intercepted before it leaves the wet zone.
- If the membrane bonds to the drain — match the method to the drain: TCNA B421C uses a clamping-ring drain, B422C uses a bonding-flange drain, both with a continuous bonded membrane.
Large-format porcelain is hard to pitch in four directions without lippage, which is the practical reason linear drains dominate curbless Florida wet rooms: one slope, fewer grout joints, and a membrane that lies in a single clean plane. The trade-off is planning the slope early, because a flat spot in a curbless floor has no curb to save it. For the full comparison, our linear versus point drain breakdown walks the slope geometry, and the wet-zone detailing carries over from the shower waterproofing assembly.
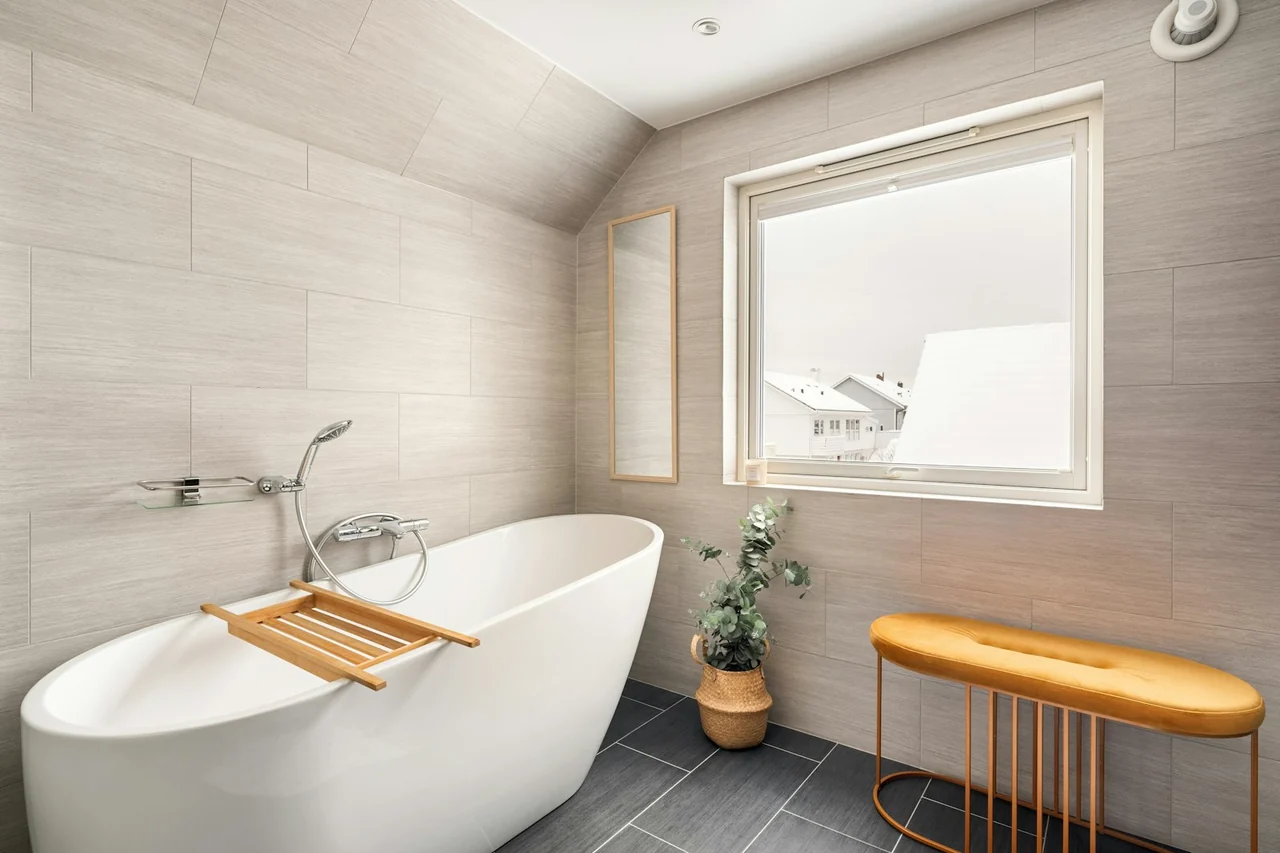
Vapor on a Florida Slab
Florida adds two pressures most wet-room advice ignores: a slab-on-grade floor in direct contact with damp soil, and a cooling-dominated climate that drives water vapor inward. Together they mean moisture pushes at the assembly from below and from the humid air, not just from the showerhead.
Two moisture loads at once
Standard Florida construction sets the bathroom floor on a concrete slab poured on grade, and that slab wicks moisture up from the ground as vapor year-round. Above it, hot humid outdoor air drives vapor toward the air-conditioned interior — the reverse of a cold climate. A continuous, low-perm tanked assembly answers both: it keeps slab moisture from migrating up into the setting bed and tile, and it presents a controlled, single waterproof plane to the inward vapor drive instead of a patchwork the moisture can exploit.
One membrane, able to dry the right way
The failure to avoid is stacking barriers. A buried polyethylene sheet under the substrate and a surface membrane on top traps moisture between them, and in a Florida wall that rarely gets to dry, trapped moisture is exactly what mold needs. The clean approach is a single surface-applied A118.10 membrane — and where vapor performance matters, the new v-rated low-perm membranes give a measured permeance instead of a guess. The assembly stays continuous, controls the slab, and is not fighting a second hidden barrier.
Free In-Home Estimate
Planning a curbless wet room?
A Pro Work Flooring project director checks the slab and layout on site and sends a written plan for tanking the whole floor to an A118.10 membrane.
Tank the Room, Step by Step
A Florida wet room is tanked from the slab up, each layer doing one job, with the membrane inspected before a single tile is set. The sequence below is the whole-floor version of a bonded A118.10 assembly.
- Step1
Prep the slab and set the substrate
Clean and profile the slab-on-grade, then build a sound, plumb wall substrate and a sloped floor base. Confirm the slab is dry enough for the membrane and adhesive chosen; on a curbless floor there is no curb to hide a moisture or flatness problem later.
- Step2
Build the slope to the drain
Pitch the floor to the chosen drain — a single plane to a linear drain or four planes to a point drain — under the membrane, not just in the tile. The slope has to evacuate water across the whole open floor, so every square foot drains and nothing pools against a wall.
- Step3
Apply the A118.10 membrane, whole floor and walls
Tank the entire floor and the wet-zone walls with a bonded A118.10 L or A118.10 S membrane, lapping into the drain and turning continuously up every wall. With liquid, build two coats to the wet-mil minimum and check each with a wet-film gauge; with sheet, embed and roll every seam and corner tight.
- Step4
Detail every penetration
Seal the drain, pipe penetrations, niche, bench, and screen anchors with the manufacturer's matching corners, pipe seals, and reinforcing band. These transitions are where a continuous tank is won or lost, so they are finished before the floor is closed up.
- Step5
Flood-test before any tile
Plug the drain, flood the floor, and let it stand to confirm the whole tank holds. Testing the entire curbless floor before tiling is what separates a wet room that lasts from one that has to be torn out — never tile over an untested tank.
- Step6
Set the tile and grout
Set large-format porcelain or the chosen tile in thin-set over the cured, tested membrane, then grout. Use the bathroom tile and grout matched to a wet room — the tile is the wear surface, and the tank underneath it is the waterproofing.
Built this way, the tank is continuous, the slope evacuates the whole floor, and the assembly is tested before it is buried. When a tear-out reveals a wet room that was waterproofed like a stall — membrane stopping short, no flood test, a flat spot with no curb to save it — the durable answer is to re-tank the room as part of a full bathroom remodel or a focused shower rebuild, and the wider Florida context lives in the Florida wet-room waterproofing guide.
Frequently Asked Questions
What is a wet room and how is it waterproofed?
Do you waterproof the whole floor in a wet room?
What is the difference between ANSI A118.10 L and S membranes?
Is a sheet membrane or liquid waterproofing better for a wet room?
How do you waterproof a curbless bathroom floor in Florida?
Does a wet room need a vapor rating in Florida?
References & Sources
- ANSI A108/A118/A136.1:2024 — Installation of Ceramic Tile (TCNA): A118.10 specifiable as L (liquid) or S (sheet), with an optional vapor-permeance v rating. https://blog.ansi.org/ansi/ansi-a108-a118-a136-2024-installation-ceramic-tile/
- ANSI A118.10 — Load Bearing, Bonded, Waterproof Membranes for Thin-set Ceramic Tile and Dimension Stone Installations (TCNA). https://tcnatile.com/resource-center/ansi-standards/
- Tile Council of North America (TCNA) Handbook for Ceramic, Glass, and Stone Tile Installation — curbless shower receptor methods B421C and B422C. https://tcnatile.com/
- Standards-based methods of installing tile in curbless shower receptors (TileLetter / NTCA) — continuous bonded membrane extended at least one foot outside the shower. https://www.tileletter.com/standards-based-methods-of-installing-tile-in-curbless-shower-receptors/
- Florida Building Code. https://floridabuilding.org/