Watch
Large-Format Tile on Florida Slabs: Lippage, Coverage & Flatness
What Counts as Large-Format
Large-format tile is any tile with at least one edge measuring 15 in or longer, per the TCNA Handbook. The number is not arbitrary: once a tile crosses that length, its own slight curvature and the slab's high and low points stop canceling out and start stacking into visible lippage. That is why a 24-by-48-in porcelain plank follows different rules than a 12-by-12-in tile.
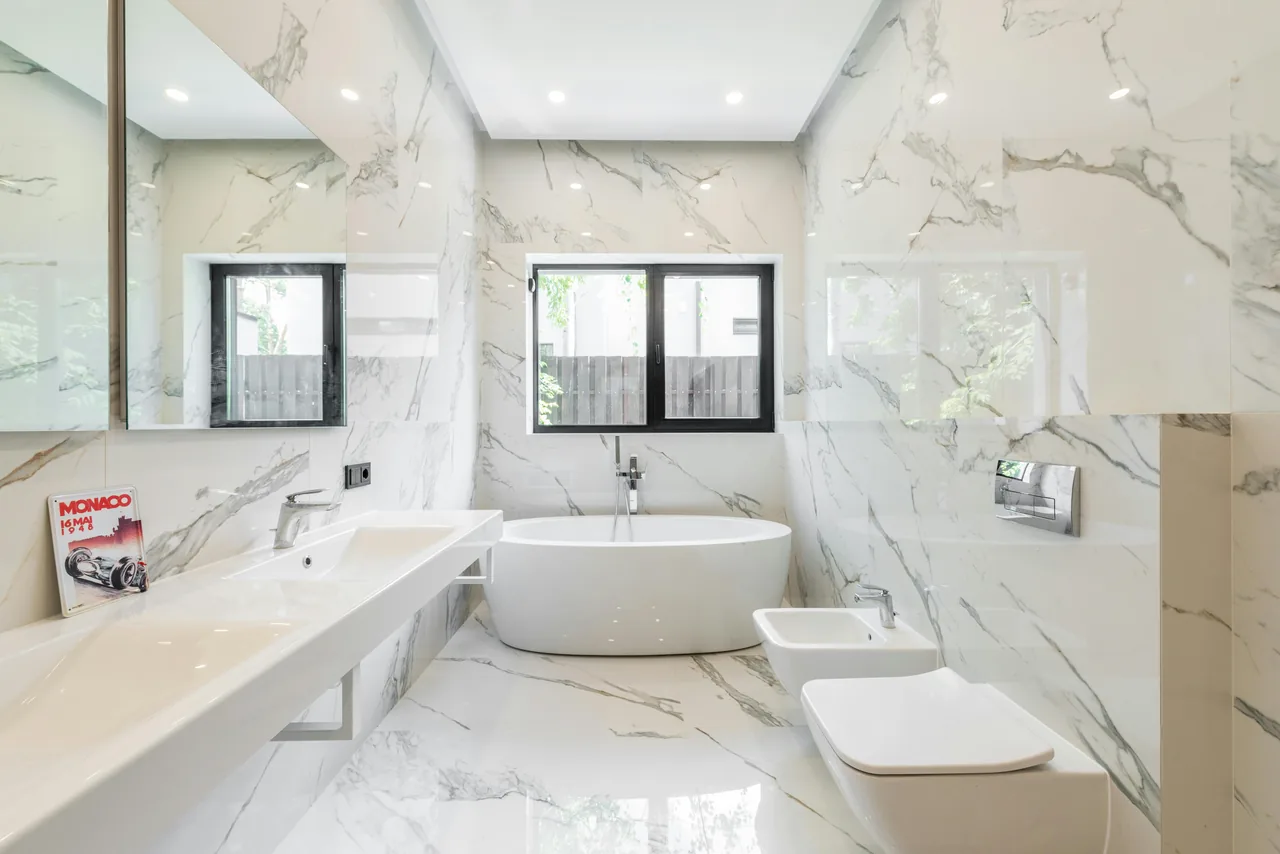
The category now covers most of what Florida homeowners actually choose — wood-look planks, large bathroom and lanai panels, and the gauged porcelain slabs used on showers and feature walls. Each shares one trait that drives every rule below: a long, stiff tile cannot bend to follow a wavy slab, so the slab has to come up to the tile.
Two physical properties decide a large tile's behavior. The first is warpage — the inherent curvature across the tile's face and edges as it leaves the kiln. The second is the slab's flatness — how far the concrete deviates from a true plane. A successful large-format floor is simply one where those two deviations stay inside the tolerances the standards define, instead of compounding into a tripping edge.
Format also interacts with the tile's edge finish. Most large-format porcelain sold in Florida is rectified, meaning the edges are mechanically ground to a precise size so tiles can run a tight, uniform grout joint. Rectification makes the joints look crisp, but it removes the slack a wider, calibrated joint would have given to hide warpage and slab waviness. The crisper the line a homeowner wants, the less tolerance the install has, and the more the slab beneath has to earn that look.
The Flatness Tolerance
For tile with any edge 15 in or longer, the substrate must not vary more than 1/8 in in 10 ft and no more than 1/16 in in 2 ft from the required plane, measured from the high points, under ANSI A108.02. That is twice as flat as the standard-tile baseline, and most as-poured Florida slabs do not meet it without help.
The contrast is the whole point. A floor receiving tile with all edges under 15 in only needs 1/4 in in 10 ft and 1/16 in in 1 ft. A concrete crew can hit that with a normal screed-and-float pour. The large-format rule halves the long-span allowance and tightens the short-span check to a 2-ft window, which exposes every roller-mark, trowel ridge, and control-joint lip a standard tile would have hidden.
- Flatness
- Deviation of the finished slab from a true level plane, checked with a 10-ft straightedge and a 2-ft straightedge. It is what the large-format tolerance governs.
- Levelness
- Whether the plane itself is horizontal. A slab can be perfectly flat yet sloped (a lanai or curbless shower is sloped on purpose). Large-format tile cares about flatness, not levelness.
This is the spec that gets the floor cited as a failure. When an inspector or homeowner sees lippage, the root cause is almost always a slab that passed the standard-tile tolerance but never the tighter large-format one. We document the moisture and flatness testing sequence in the Florida slab prep guide, because in this state the same as-poured slab also has to clear a vapor-emission test before any tile goes down.
| Spec | Standard tile (< 15 in) | Large-format (≥ 15 in) | Standard |
|---|---|---|---|
| Slab flatness, long span | 1/4 in in 10 ft | 1/8 in in 10 ft | ANSI A108.02 |
| Slab flatness, short span | 1/16 in in 1 ft | 1/16 in in 2 ft | ANSI A108.02 |
| Mortar coverage (dry / wet) | 80% / 95% | 80% / 95%, back-buttered | ANSI A108.5 |
| Mortar type | Dry-set / modified | LHT medium-bed | ANSI A118.15 |
| Running-bond offset | Up to 50% | Max 33% | TCNA Handbook |
The table reads as one escalating requirement: nothing about the large-format column is optional, and every cell traces to a published standard rather than a manufacturer preference. A crew that treats a 24-by-48-in plank like a big 12-by-12-in tile will satisfy the left column and fail the right one, which is exactly how a floor that looked acceptable at install develops lippage within its first season of use.
Coverage and the Right Mortar
Mortar coverage under ANSI A108.5 must reach at least 80% of the tile back in dry interior areas and at least 95% in wet or exterior areas, with full support at every corner and edge. Large tiles rarely hit those numbers with notched-trowel ridges alone, so back-buttering — skimming the tile back with mortar — becomes standard practice rather than an upgrade.
The mortar itself changes too. Long, heavy tile should be set in a large-and-heavy-tile (LHT) medium-bed mortar meeting ANSI A118.15, which can be built up to roughly 3/4 in thick to fill behind a warped tile without slumping. A thin, standard dry-set mortar cannot bridge that gap; it leaves voids that read as hollow spots and crack under point loads like a dropped pot or a chair leg.
Coverage is also a Florida-specific durability issue. A void under a wet-area tile traps moisture against the slab in a climate that never dries it out, and the 95% rule exists precisely to eliminate that pocket. The same logic carries into showers and lanais, where the low-absorption porcelain we install is only as waterproof as the bed of mortar holding it has no gaps.
Controlling Lippage
Lippage is the difference in elevation between the edges of two adjacent tiles, and ANSI A108.02 caps it. For grout joints from 1/16 in to under 1/4 in, allowable lippage is 1/32 in plus the tile's inherent warpage; for joints 1/4 in and wider it is 1/16 in plus warpage. Because warpage is added in, a wider grout joint legitimately buys more forgiveness.
Two moves keep a long tile inside that tolerance. The first is the offset: a traditional running-bond pattern stacks a tile's high center against its neighbor's low end, so for any tile with a side over 15 in, drop the stagger from 50% to a maximum of 33%, as the TCNA Handbook directs. The second is hardware — a leveling-clip system that ties adjacent tiles to a common plane while the mortar cures, forcing edges flush and pulling the tile down into full contact.
Joint width is the quiet variable. Rectified large-format tile can run a tight joint, but a tighter joint leaves no room to absorb warpage, which is why a minimum 1/8-in joint is the realistic floor for rectified tile and why pressing for a near-invisible line on a 48-in plank invites lippage. We size joints to the tile's measured warpage on site, not to a showroom preference, and detail the layout in our custom tile design work.
Leveling clips do real work, but they are a finishing tool, not a substitute for a flat slab. A clip can pull two edges flush across a small local difference while the mortar sets; it cannot hold a tile flat across a slab that dishes a quarter inch over the run, because the clip simply tents the tile and transfers the stress to the next joint. The honest order of operations is to make the slab flat first, then use clips to manage the residual warpage the standards already permit.
There is a Florida wrinkle to the offset rule as well. Wood-look plank, the format many homeowners want, is long and narrow by design, so its warpage concentrates along a single long edge. Staggering those planks at 50% lines up the high middle of one plank against the low end of the next almost perfectly — the worst case for lippage — which is why the 33% cap matters more for plank than for square tile, not less.
When Self-Leveling Is Mandatory
Self-leveling underlayment (SLU) — a hydraulic-cement topping tested under ASTM C1708 — becomes mandatory the moment a primed, straightedge check shows the slab cannot meet 1/8 in in 10 ft or 1/16 in in 2 ft. On an as-poured Florida slab-on-grade, that is the common case, not the exception, because the slab was floated to a standard-tile tolerance the large-format rule does not accept.
SLU is poured over a compatible primer, finds its own plane by gravity, and cures into a flat substrate that accepts tile within hours. It corrects broad dishing and high spots that grinding alone cannot fix economically, and it does so without changing the slab's structure. The alternative — chasing flatness with extra mortar under each tile — fights the coverage rule and the lippage rule at the same time, and usually loses.
Not every floor needs it. A slab that already measures inside the large-format band only needs cleaning, priming, and a bond check. The decision is binary and made with a straightedge, never by eye, which is why a written flatness check belongs in the scope before a single box of tile is opened. Our crews carry that check into our floor leveling scope on every large-format job.
Does this slab need SLU?
- Slab varies more than 1/8 in over 10 ft — pour self-leveling underlayment to bring it into large-format tolerance.
- Slab varies more than 1/16 in over 2 ft (local humps or dips) — grind the high spots or skim with SLU before setting.
- Slab is within both limits but has surface contamination — clean, prime, and verify bond; no SLU needed.
- Slab is within tolerance and sound — proceed to layout, mortar selection, and leveling clips.
The Florida Method
Setting large-format tile flat over a Florida slab is a fixed sequence, and skipping a step is what produces the failures above. Each stage maps to one of the standards already covered, so the method is just those specs executed in order.
- Step1
Test the slab for flatness and moisture
Run a 10-ft and a 2-ft straightedge across the slab and mark every spot over 1/8 in or 1/16 in. In Florida, pair this with a vapor-emission test, since slab-on-grade concrete drives moisture upward year-round.
- Step2
Bring the slab into large-format tolerance
Grind isolated high spots; pour self-leveling underlayment over a compatible primer for broad waviness. Re-check with the straightedge until the slab holds 1/8 in in 10 ft and 1/16 in in 2 ft.
- Step3
Dry-lay and set the offset
Measure each tile's warpage, set the grout joint to suit it, and stagger the pattern to a maximum 33% offset for any side over 15 in. A dry layout locates the worst tiles before they are bonded.
- Step4
Comb, back-butter, and embed in LHT mortar
Trowel an ANSI A118.15 large-and-heavy-tile mortar, back-butter the tile, and beat it in to reach 80% coverage in dry rooms or 95% in wet and exterior areas with full edge support.
- Step5
Set leveling clips and let it cure flat
Install a leveling-clip system at every joint to pull adjacent edges flush, hold the lippage to 1/32 in plus warpage, and leave the clips until the mortar cures before grouting.
Free In-Home Estimate
Is your slab flat enough for large-format tile?
A Pro Work Flooring project director straightedges the slab on site and sends a written estimate with the prep your floor actually needs.
The thread through every step is the same: a long tile cannot follow a wavy slab, so the slab is made flat first, the mortar is chosen to fill warpage, and the clips hold the plane while it cures. Done in that order, large-format tile is one of the most durable floors in a Florida home — start the sequence with our floor tile installation team, and see how it fits the wider strategy in the complete Florida tile guide.
Frequently Asked Questions
How flat does a slab have to be for large-format tile in Florida?
What is the mortar coverage requirement for large tile?
What mortar should I use for large-format tile?
How much lippage is acceptable on a large-format floor?
Do I need self-leveling underlayment for large tile?
Why does large-format tile crack or lift on a Florida slab?
References & Sources
- ANSI A108.02 — General Requirements, Subsurfaces and Preparations (substrate flatness and lippage, sections 4.1.4 and 4.3.7). https://tcnatile.com/resource-center/ansi-standards/
- ANSI A108.5 — Installation of Ceramic Tile with Dry-Set or Latex-Portland Cement Mortar (mortar coverage 80% / 95%). https://tcnatile.com/resource-center/ansi-standards/
- ANSI A118.15 — Improved Modified Dry-Set Cement Mortar (large-and-heavy-tile / medium-bed mortar). https://tcnatile.com/resource-center/ansi-standards/
- Ceramic Tile Education Foundation — Is Your Floor Flat Enough for Large-Format Tile?. https://www.ceramictilefoundation.org/blog/floor-or-wall-flat-enough-for-large-format-tile
- Tile Council of North America — Lippage and Warpage. https://tcnatile.com/resource-center/faq/lippage/
- ASTM C1708 — Standard Test Methods for Self-Leveling Mortars Containing Hydraulic Cements. https://store.astm.org/c1708-12.html